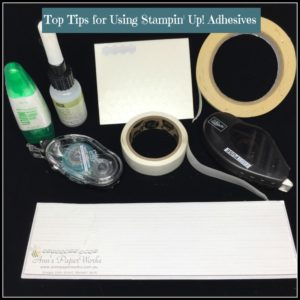
 Stampin’ Up! Adhesives – each different but all necessary for the papercrafter
Stampin’ Up! has eight different adhesives, each having a different purpose so it can get a little confusing, especially for beginner crafters. Choosing the right Stampin’ Up! adhesives can be the difference between success and failure on most projects. Some adhesives are heavy duty, others are repositionable, some thick, some thin. This handy guide will help you choose which adhesive is best for your project as well as some tips and tricks.
FAST FUSE:
FAST FUSE is a super-strength acid free permanent adhesive tape runner which bonds instantly. Perfect for heavier layers but it can be a little tricky to use – a lighter touch works better than a heavier hand. The video provides some great tips when using this product. Great for paper crafting including fancy folds cards, especially box and bag making. Works with the Glimmer side of Glimmer Paper as well. Stronger than snail. All you have to do is press tip to paper and pull backwards (never push forward). Pop in refills are available and these require no feeding of tape through the case – easy peasy!
SNAIL ADHESIVE:
SNAIL is a double sided acid free adhesive tape runner, suitable for both cardmaking and scrapbooking. This is my ‘go to’ adhesive for building layers of cardstock, attaching photos and even ribbon. It is a little forgiving as you can lift it off once adhered (which you cannot do with Fast Fuse). If you do lift off once adhered, you will need to reapply the adhesive. I tap tap tap the adhesive around the edges of the project rather than running completely around the outside. This makes it easier to remove if you make a mistake and saves you some money as well. It is very economical, mess-free and easy to use. All you have to do is press tip to paper and pull backwards (never push forward). Adhesive Remover (#103684) works well with SNAIL if a mistake has occurred. Pop in refills are available and these require no feeding of tape through the case. Press tabs on each side of the case to remove the empty cartridge, remove the yellow cardboard and snap the refill into the case – easy peasy!
FINE TIP GLUE PEN:
FINE TIP GLUE PEN is a super strong adhesive with a very fine tip, perfect for adhering small embellishments, glitter and intricate paper cutouts to projects. You can also use it to add shine or a lacquer look to any die cuts or stamped images (similar to Stampin’ Up!’s retired Crystal Effects) but you do need to allow plenty of time to dry (at least overnight). This is an adhesive where ‘less is more’. I use this product to create a fine line of glue. Randomly adding drops to a paper project provides some easy bling. It is important that you replace the cap immediately after use or otherwise the tip will clog with adhesive which has set. Always store upright.
It can be tricky to insert the pin into the tip of the Fine Tip Glue Pen. I have no problem, just rest both the lid pin and the pen tip on your finger to line up and insert the pin.
MULTIPURPOSE LIQUID GLUE:
One of my favourites as it is a general purpose adhesive, with a fine tip for precision application and a chisel tip for larger areas. Recommended for glitter, sequins, paper, cardstock and embellishments. It dries quickly and clear. The best feature of this adhesive is that there is a slight delay before it dries which allows you to adjust the placement of your embellishment or cardstock. Easily removed with the Adhesive Remover (#103684). I always store this glue upside down.
When adhered whilst the glue is still wet, it will result in a permanent bond but when allowed to dry first, the element becomes repositionable!
MINI GLUE DOTS:
Glue dots (300 – 3/16″) are super sticky, acid free, mess-free adhesive dots for adhering buttons, pearls, ribbon, small die cuts and small embellishments. It is also the best adhesive for the glimmer side of Glimmer Paper. To add a glue dot to an item, unroll paper backing to expose next glue dot, firmly press item to the dot, then lift to remove the dot from the backing paper. Another option is to use your Paper Piercing Tool to pick up the glue dot and apply to your embellishment.
TEAR AND TAPE:
TEAR AND TAPE is a double-sided strong adhesive tape suitable for box- making, home decor and 3-D projects. Bonds instantly with an easy to tear paper backing (does not need to be cut). Place tape onto project and tear from roll. Press the tape firmly to adhere to cardstock. Remove paper backing. This tape is suitable for adhering glitter (make sure you rub in) to make a 1/4″ straight line glitter strip.
STAMPIN’ DIMENSIONALS:
STAMPIN’ DIMENSIONALS are double sided adhesive foam dots (300 pieces – three sheets) which add depth and dimension. Great to pop-up layers.
Use the leftover dimensional edges after all the hexagons are gone by cutting them up into very small pieces or use as strips.
FOAM ADHESIVE STRIPS:
FOAM ADHESIVE STRIPS come in two sheets of long thin foam strips (9.1m – 1/8″) which are suitable for creating shaker and spinner cards or for popping-up small or narrow layers – recommended for sentiments or embellishments. These strips provide higher dimension than Stampin’ Dimensionals.
Contact me if you have any questions about Stampin’ Up! adhesives.
For further information on Stampin’ Up! adhesives, just click on the items pictured to view in my Online Store. I would love to be your Demonstrator if you don’t already have one and live in Australia. All these products can be purchased through my online shop or ordered through me. Please allow Demonstrator contact when ordering online so I can thank you properly.


Unfortunately the adhesive remover is no longer available.