


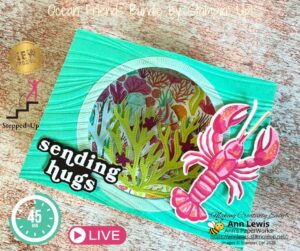
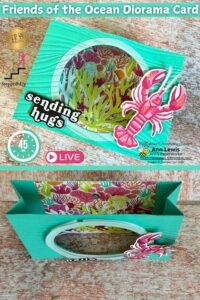
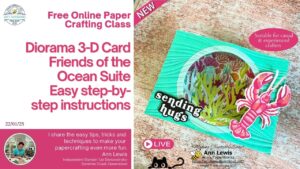
If you’ve ever wanted to create a handmade card that’s more than just a folded piece of cardstock, you’re in for a treat! I’m sharing a step-by-step tutorial on how to make a diorama card using the Friends of the Ocean Suite—a gorgeous collection inspired by the sea. And the best part? You can craft along with me! I hosted a live class featuring this project, and the full replay is available on my YouTube channel. So whether you love following written instructions or prefer watching a video, I’ve got you covered.
What Is a Diorama Card?
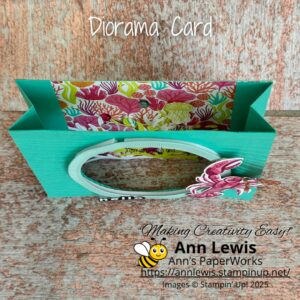
Think of a diorama card as a little shadow box in card form. It has layered depth, cut-out windows, and a 3D effect that makes it feel like you’re peering into an ocean scene. Unlike traditional flat cards, a diorama card stands up on its own and makes a real impact when displayed. If you want to impress your friends and family (without needing an engineering degree), this is the card for you!
Why You’ll Love This Project
It’s beginner-friendly (yes, really!)—I break down each step so you can follow along with ease. You get to play with colour—the ocean-inspired hues in the Friends of the Ocean Suite are simply stunning. It folds flat for mailing—because no one likes paying extra postage! It’s a showstopper—perfect for birthdays, thank-you cards, or just because.
Supplies & Cut-Out Measurements (this project has been designed using inches)
Cardstock & Designer Series Paper (DSP)
- Card Base (Front & Back): Summer Splash cardstock – two pieces measuring 5-1/2″ x 4-1/8″
- Side Pieces: Summer Splash cardstock – two pieces measuring 3″ x 4-1/8″, scored at 3/4″, 1-1/2″, and 2-1/4″
- Back Panel: Friends of the Ocean Designer Series Paper (DSP) – 5-1/2″ x 4-1/8″
- Basic White Cardstock: 3-7/8″ x 5-1/4″
Die-Cut & Fussy-Cut Elements
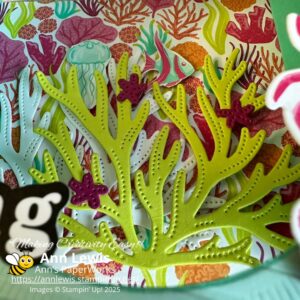
- Lobster/Crayfish: Die-cut from the Friends of the Ocean DSP
- Starfish & Branches: Die-cut from Basic White, Berry Burst, and Lemon Lime Twist cardstock using the Ocean Friends Bundle
- Marine Animals: Fussy cut from Friends of the Ocean DSP
Additional Die-Cutting
- Circle Frame: Die-cut a Pool Party circle frame using the two largest circles from the Spotlight on Nature Dies
- Front Card Base Circle: Die-cut a circle from the Summer Splash front card base. Optional: Emboss using the Soft Waves Embossing 3-D Folder.
- Assembly Tip: Adhere the Pool Party circle frame to the front card base circle using Foam Adhesive Strips for extra dimension
Finishing Touches
- Sentiment: Use a sentiment from the Greetings for All Mix & Match Ephemera Pack for the front of the card
- Embellishments: Decorate with Sunny Day Iridescent Dots
Assembly Instructions
Follow along with the video tutorial for step-by-step assembly!
Watch the tutorial on YouTube!
Prefer to watch and craft along with me? You can catch the full class replay here: https://www.youtube.com/watch?v=Z8xHHU1voww&t=344s
In this video, I walk you through:
✅ How to assemble the diorama card step-by-step
✅ The best way to layer your ocean-themed elements for maximum depth
✅ Tips for using coordinating stamps, dies, and embellishments
✅ Common mistakes to avoid (so you don’t end up with an upside-down fish—it has been known to happen!)
Now that you have everything you need, it’s time to dive in and create your own Friends of the Ocean Diorama Card! I’d love to see what you make, so be sure to share your creations in the comments or tag me on social media.
Stampin’ Up! Product List

 Designer Series Paper")

")


")


