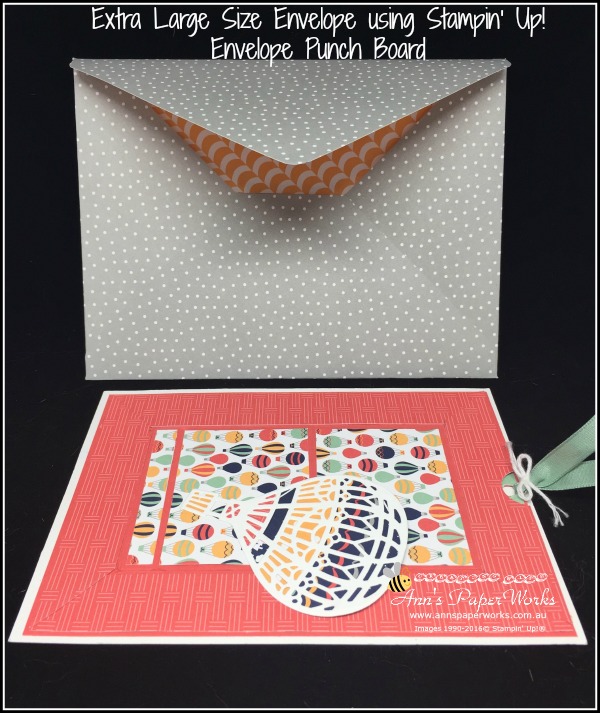
Custom Envelopes using the Envelope Punch Board
I know that some of you avoid creating non-standard card sizes so that you don’t have ‘envelope issues’. But with an Envelope Punch Board (EPB) you easily can create custom sized envelopes. This is such a versatile tool and easy to use. The instructions are included on the EPB.
My pop-up card featuring the Lift Me Up Bundle (Stamp Set and Thinlits) is 7-1/4″ x 5-1/4″ (tutorial coming). Of course, I could have used a large business envelope but it wouldn’t have looked as nice. This way I now have a matching envelope and it is a great way to use up your leftover Designer Series Paper. I calculated the size of the cardstock and position of scoreline, using the guide on the Envelope Punch Board (7-1/2″ x 5-1/2″ was the closest). This is not a standard size envelope, so there will be additional postage. Sometimes I use Crafty Owl’s Envelope Expert calculator. There is also a box buster calculator to make boxes using the EPB.
How to make the envelope for this project?
To make it easy I have put together a video to show you how easy this envelope is to create. Check it out here. Subscribe to my YouTube Channel whilst you are there.
Time required: Three minutes – yes, it is that quick
You will need a piece of Designer Series Paper (patterned paper) 10-1/2″ x 10-1/2″ (25.4 cm) square. Your first punch and score will be at 4-1/2″ (10.2 cm). After that, you turn your paper 90° clockwise and line up your previous score with the SCORE GUIDE on the EPB. Score and punch. Repeat this step twice. Assemble your envelope, gently reinforcing your score lines with your bone folder. Use the corner rounder punch (on the EPB it is called the reverse punch ) on the EPB to round off the top flap of the envelope. I use Snail Adhesive to adhere the envelope together.
If you are still unsure how to use the Envelope Punch Board, check out this YouTube video from Stampin’ Up!
Stampin’ Up! Product List
For further information about the products used in this project, just click on the items below to view in my Online Store. I would love to be your Demonstrator if you don’t already have one and live in Australia. All these products can be purchased through my online shop or ordered through me. Please allow Demonstrator contact when ordering online so I can thank you properly.
|
|
|
Did you know that I have an inch to centimetre converter on my website? It is on the right side of every page, just scroll on down. Enter your inch or centimetre measurement and the conversion occurs immediately. What a nifty tool!
Thanks for dropping by.


Excellent tutorial Ann…
Thanks, Fran. Glad that yu have found it helpful.