Beautiful You Coaster Tile steals the show
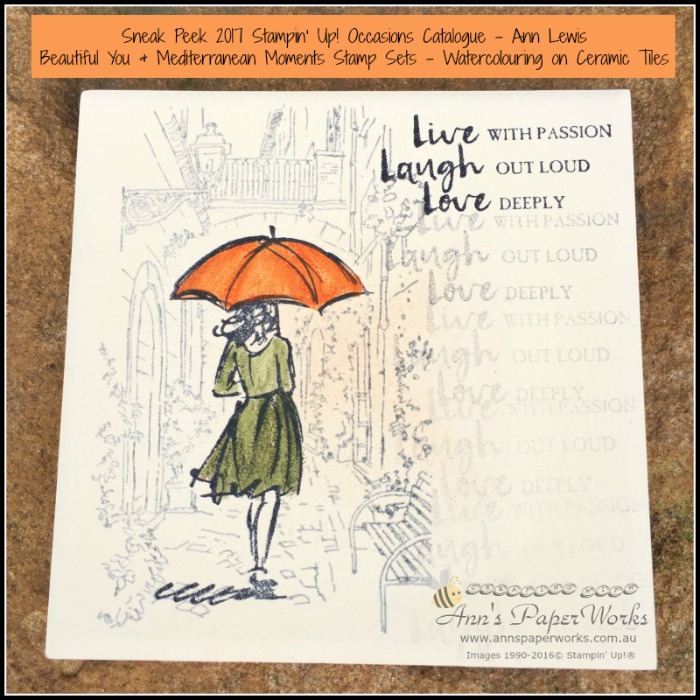
Afternoon everyone. Things are pretty busy around here at the moment as I get ready for the release of the new annual catalogue on 1 June. One of the products that carried over from the Occasions Catalogue was a favourite, and it seems, one of your favourites as well, the Beautiful You Stamp Set. You might remember that I previously posted a tutorial on creating this Beautiful You Coaster Tile (pictured below) using the Beautiful You Stamp Set and Stampin’ Up!’s Watercolor Pencils – Beautiful You Watercolour Tile Sneak Peek.
As this project was very popular, with all the classes booking out, I have now put together a step by step YouTube video tutorial, so you can easily create your own coaster tiles – video can be found here.
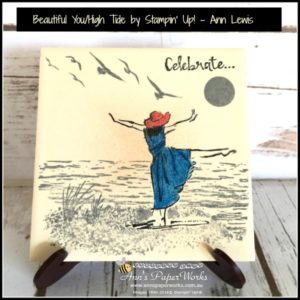
Beautiful You and High Tide stamp sets join forces
This project proved to be very popular and I received several requests to do a video. However, I wanted to highlight a different image on the coaster tile, one that combined two stamp sets (Beautiful You and High Tide Stamp Sets) and used both watercoloring and masking techniques, similar to the one above.
I love watercolouring (using the Blender Pens) on bisque ware tiles using Stampin’ Up!’s relatively new Watercolor Pencils. They make it so easy to colour images and the colour is so vivid it jumps off the ‘page’. I have made a series of these tiles, all using different stamps whilst still featuring one of the images from the Beautiful You Stamp Set.
All the details of the products I used in the project featured above can be found here.
Once you have decorated your tiles, you can spray a sealant on the tiles to protect them against moisture. I used a matte spray finish from the local craft store.
Beautiful You Coaster Tile YouTube video tutorial
Stampin’ Up! Product List
For further information re the products used in this project, just click on the items below to view in my Online Store. I would love to be your Demonstrator if you don’t already have one and live in Australia. All these products can be purchased through my online shop or ordered directly through me. Please allow Demonstrator contact when ordering online so I can thank you properly. Stamp sets used in this project may be available in other mount options (wood-mount, clear-mount or photopolymer). I have listed the option that I used.
Hope you enjoyed today’s post. If you would like a FREE copy of the new Stampin’ Up! Annual catalogue, contact me now. You qualify for a FREE catalogue if you:
- do not have a current demonstrator that you wish to purchase from
- are not a current demonstrator;
- you wish to purchase some amazing Stampin’ Up! products; and
- live in Australia.
Have a wonderful day.


Thank you for your video. I’m having difficulties with not having the blended from smearing when I put the sealant on it. Any suggestions?
Hi Ethel, I think it will depend on the actual sealant that you use. I live in Australia so our brands are usually different. Not sure what you mean about ‘not having the blended from smearing”. Are you using alcohol pens, watercolour pencils blended with the Blenders or something else.
Great video! What do you use to keep the ink from running when you put a cold drink on the coaster?
Thanks Denise. Glad you like the video. You can seal it with a clear matt spray available from most craft stores.
Your coasters are beautiful, Ann! Thanks so much for sharing the video with how to make them!
Thanks so much for dropping by and leaving some feedback. It always makes my day. If you have any issues, let me know.