Top 10 secrets for keeping your crafting ‘stuff’ in tip top condition
So have you ever wondered how the experts keep their crafting ‘stuff’ in tip top condition.
Well, here are my secrets which I have gleaned over twenty-five years of papercrafting.
- Clear Blocks: Keep your Stampin’ Up! clear mount blocks clean by using hand sanitiser (alcohol based – I use Purell brand) – hand sanitiser removes any adhesive, residual ink and dirt from your blocks leaving them sparkling clean.
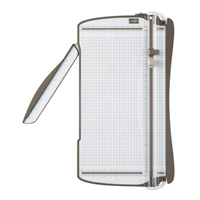
- Stampin’ Trimmer: If your blade is not ‘sliding correctly’ on its track in your Stampin’ Trimmer, grab a cotton tip and soak the tip in Orange Power (the one I recommend, available from supermarkets) or Eucalyptus Oil. Clean your tracks both sides, top and bottom. Whilst you are at it, clean any dirt or adhesive off your trimmer platform. Make sure you wipe off all oil before using your trimmer again. This ‘lubricates’ your track and removes any stray adhesive. Also make sure you clean out the track on your trimmer to remove any paper shavings. I do this by running the edge of some cardstock down the groove – easy peasy! How does adhesive get everywhere when you are crafting?
- Stampin’ Trimmer: Always lock your Stampin’ Trimmer (yes there is a lock on the top of the Stampin’ Trimmer) when transporting or storing. If you drop it, there is less chance of it being broken.
- Cardstock: Store your cardstock in a opaque box or cupboard where light can not spoil your cardstock. Clear plastic containers will not protect your cardstock from fading over time, especially if stored close to a window.
- Photopolymer stamps: Stampin’ Up! photopolymer stamps are super ‘sticky’ which means that they easily stick to clear blocks – and everything else. Immediately replace your photopolymer stamps back into their Stamp Cases once you have finished with them as they are prone to be lost on your crafting desk, especially those pesky little tiny stamps.
- Multipurpose Adhesive: Store your multipurpose adhesive upside down so that it is always ready to go and you don’t have to squeeze hard to get the liquid adhesive to run freely.
- Big Shot: Reverse your Big Shot ‘sandwich’ when storing your Big Shot – two acrylic plates on the bottom and then your Big Shot Platform on top and roll the ‘sandwich’ back through your Big Shot. This strategy spreads the pressure onto your acrylic plates and flattens them overnight. My plates are over three years old and are constantly in use including for classes – whilst they are marked, they are flat and still work.
- Big Shot Standard Cutting Plates: Clean your Big Shot plates (all those little cuts in your platform contain small strips of paper) by filling your sink with hot soapy water (not boiling water), and scrubbing with a scrubbing brush. Watch all those little pieces of paper come out and your acrylic plates look ‘nearly’ new again. Whilst the acrylic plates are still warm, store them back into your Big Shot (see step 6). Do not place your plates in the oven – this is not recommended by the makers of the Big Shot.
- Stampin’ Classic Ink Pads: Store your Stampin’ Up classic ink pads the ‘right side’ up (not upside down or on their side as they are particularly and can leak) – their unique folding system always deliver the ink onto of the pad. After using an ink pad, always clean any ink left on the outside of your ink pad to stop it accidently ‘spreading’ to your project.
- Fine Tip Glue Pen: As soon as you finish using the Fine Tip Glue Pen, wipe the tip off with a clean cloth and the replace lid immediately.
For further information for the products mentioned, just click on the items below to view in my Online Store. I would love to be your Demonstrator if you don’t already have one and live in Australia. All these products can be purchased through my online shop or ordered through me.
Need any help with a crafting problem, contact me.


