Christmas Baby Bear for Christmas in July
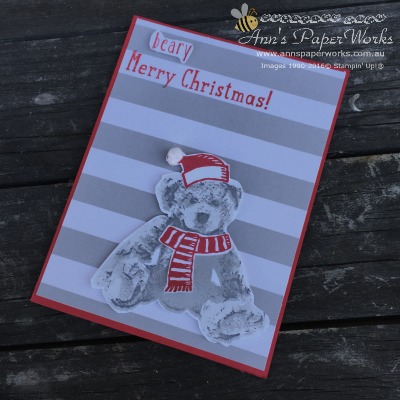
This is the first card in my series for Christmas in July and features the Baby Bear Stamp Set. The Baby Bear set was one of my favourites from the catalogue from day one and I certainly have been rabbiting on about it. I think this is my favourite card of the series. Sooooo cute! The santa hat, scarf and sentiments come from the Snow Place Stamp Set. I love combining different stamps in this way. It certainly increases the versatility of both sets. The Baby Bear set wouldn’t normally be considered a Christmas set, but with a little bit of imagination, it was easily converted.
Ingredients:
Paper: Cardbase: 8-1/4” x 5-1/2” Real Red C/S; Patterned Layer: 4-1/8” x 5-3/8” A Little Foxy DSP Stack; Card Insert: 3-7/8” x 5-1/4” Whisper White C/S; Strip of coordinating Patterned Paper 1” x 4”
Ink: Scarf, Santa hat and sentiment stamped in Real Red; Baby Bear is a three-step stamp (from lightest to darkest):
- Step one – Smoky Slate ‘stamped off’
- Step two – Smoky Slate
- Step three – Basic Gray Archival
TIPS: When stamping your images, don’t forget to use the Stampin’ Up! Paper Piercing mat underneath your cardstock as these are solid photopolymer stamps. To line the stamps up correctly, match at armpits, bottom and head. Ink your stamp well before each step. And don’t panic about it being a three step stamp, it is a very forgiving set to use.
Details:
The ‘Merry Christmas’ sentiment is stamped in Real Red, directly onto the DSP. The ‘beary’ sentiment is stamped onto some scrap Whisper White C/S, fussy cut and adhered with dimensionals.
The little white pompom is adhered with a Glue Dot to Santa’s hat. Baby Bear stamped image is fussy cut and adhered using Stampin’ Dimensionals.
The scarf is adhered directly to the bear (I used multipurpose glue) and Santa’s hat is adhered to the bear, with the top part adhered with a ‘cut-down’ dimensional.
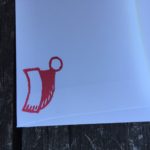
The strip of Patterned Paper is stamped on the right with a Santa’s hat and adhered to the bottom of the card insert. Stamp sentiment of your choice in Real Red onto card insert and then adhere to the inside of the card. The Santa’s hat is also stamped onto the back of the envelope (bottom right hand corner).
Stampin’ Up! Product List
For further information for the products used in today’s project, just click on the items below to view in my Online Store. I would love to be your Demonstrator if you don’t already have one and live in Australia. All these products can be purchased through my online shop or ordered through me.


